Author: admin

  • Studio Sound Panels

    Studio Sound Panels

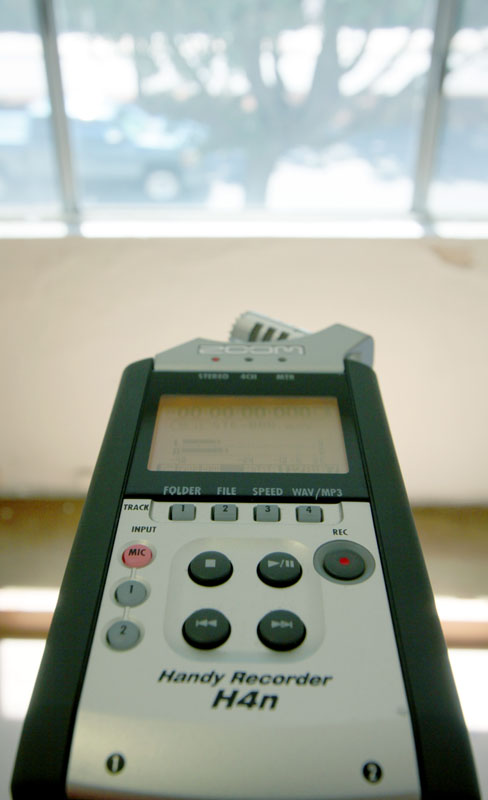
    Zoom audio recorder with window and passing traffic

    I spend most of our 3-day weekend building sound insulation panels for my home green-screen insert stage. As you can see from the photo above the front room area I use for shooting tutorials is directly adjacent to a very busy road. My initial measurements with a Zoom audio recorder in the untreated room put the traffic noise at about -31.5 dB.

    For sound panels I build simple wood 2×4 frames and faced them with dry wall. Next I back-filled the empty space with alternating sheets of Styrofoam and sound board (a denser building-board type material) and then finally some roll insulation. The idea here is that to reduce sound transmission (as opposed to sound reflection) you need to force the sound to travel through several different types of material. By alternating denser and lighter materials the sound is dispersed further with every transition, giving good results with a fairly narrow panel.

    The results? With the new panels in place my traffic noise has dropped to -39.75 dB, a drop of 8.25 dB. Combined with the use of a directional shotgun microphone or a proximity sensitive lavalier mic this should allow me to record tutorials with little or no background traffic noise.

    Stay tuned for some examples in the near future.

  • Moore’s law of 8-bit computers

    Moore’s law of 8-bit computers

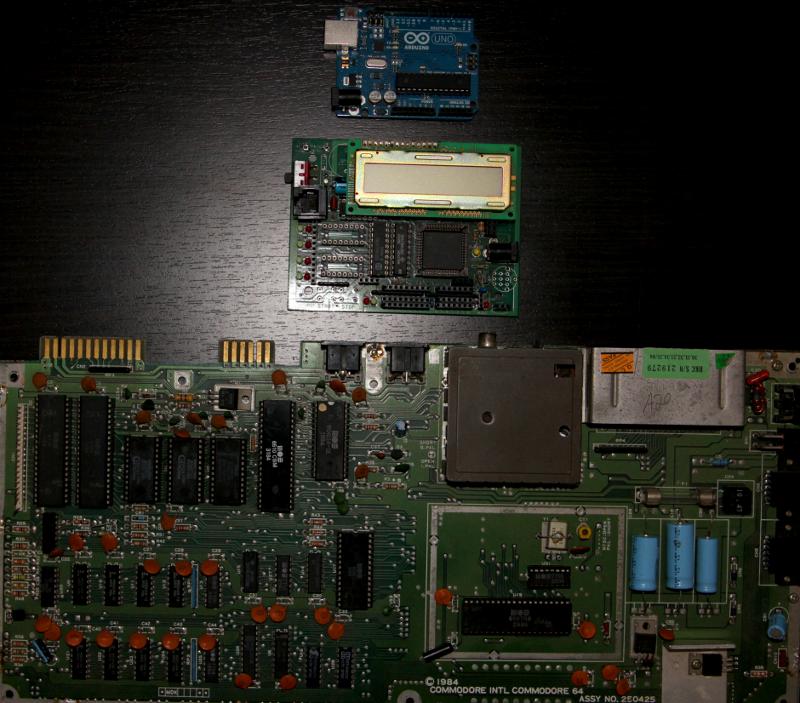
    A visual example of Moore's Law for 8-bit computers

    Here’s a visual example of where 8-bit computers came from and where they are now:

    On the bottom, a Commodore 64 home computer motherboard circa 1984, running at 1MHz. – original cost about $600.

    In the middle, an MIT Handyboard robotics controller circa 1995, running at 2MHz. – original cost about $200.

    At the top, an Arduino microcontroller circa 2010, running at 16MHz. – cost… about 30 bucks.

    But only one of them can play Tower Toppler.

  • Linux Mint on a Sony Vaio Laptop

    Linux Mint on a Sony Vaio Laptop

    Linux Mint Logo

    I’ve just finished installing Linux Mint on a mostly ignored Sony Vaio laptop. This machine came with one of the first distributions of Windows Vista (and with only a gig of memory, shared with the video card) so it was dog slow.

    As I’m starting to develop training materials for the Raspberry Pi I figured it was time to beef up my Linux skills and the Linux Mint install is a good starting point*.

    Installation is a breeze assuming you are totally overwriting the Vista install (highly recommended)! The distro disc is also a live DVD so you can boot and run a Linux Mint OS directly from the DVD to try things out with your hardware before you make things permanent. So far I’m very pleased. Running Mint the Vaio is easily 3 times faster

    * – once I started using the linux shell to navigate directories, list files, etc I realized I haven’t really used a Unix system since 1988 or so in college. That pre-dates Linux by about 3 years. lol.

  • Thanks for the Tip Canabalt

    Thanks for the Tip Canabalt

    20120822-161631.jpg

    Apparently huge smoking metal towers that fall from the sky are bad for your health.

    Rediscovering the joys of a good side scroller…

    Check out Canabalt and be sure to wear your headphones!

  • RoboShield Prototype part 2

    RoboShield Prototype part 2

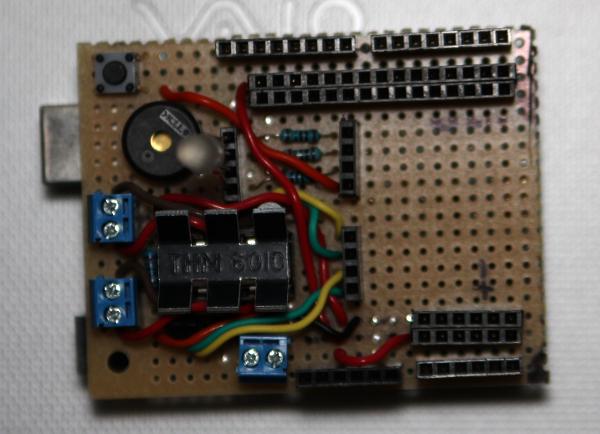
    The finished RoboShield prototype daughter-board for the Arduino microcontroller

    Here is the finished prototype of the RoboShield, a robotics daughter-board for the Arduino microcontroller. Here’s the tour:

    • upper-left – reset button
    • bottom-left – motor control h-bridge including 2 motor outputs and one motor power input
    • left above motor controller – piezo buzzer, RGB LED, and current limiting resistors
    • top-right – the Arudino’s 14 digital pins along with ground and 5v busses
    • bottom-middle – the Arduino’s power header
    • bottom-right – The Arduino’s analog inputs along with ground and 5v busses
    • center running vertically – patch bays that allow assignment of the motor control, LED, and buzzer lines to any of the Arduino’s digital pins.

    The empty space on the middle-right could be ued for servo motor connects. I’m still trying to decide if I need them.

    Because all the component control lines on the board are routed to patch bay headers you have complete control of which Arudino pins you use for what. Also if you’re not using a component it doesn’t need to be taking up any pins

    The ground and 5v busses spaced away from the input pins is an idea I borrowed from the MIT HandyBoard that was popular in hobby robtics several years ago (circa 1995). In many ways it was the progenitor of the Arduino

    Here’s a page that explains how to connect various sensors to the Handyboard (and now the Robo-Shield as well).

  • Raspberry Pi No Waiting…

    Raspberry Pi No Waiting…


    Well, okay, some waiting. I just placed my order for a Raspberry Pi single-board Linux computer (street price about $35). In theory it will be here in about 30 days. Much better than the 4-month lead times from when they first came out.

    I’ll be using it to port my Intro to Arduino and Electroics class into an Intro to Raspberry Pi and Electronics class. Yep, gonna start working on that just as soon as it arrives… in September…

    In the mean time I need to brush up my Linux skills…

    For more information on the amazing Raspberry Pi click HERE

  • Arduino Programming Notebook

    Here’s the link to the Arduino Programming Notebook free PDF download, written by Brian W. Evans. It’s a handy reference to the Arduino programming language and even includes a few simple circuits with matching code in the back. You can also order a printed version for about $5.